How it works
The library provide the following interfaces:
Gns3Connector: Main object that interacts with the GNS3 server REST API and its objective is to be its interface.Project: Interface of a project/lab defined.Node: Interface of a node/entity defined.Link: Interface of a link defined.
The Gns3Connector is mandatory and needs to be assigned to the Project, Node or Link object you want to work with, the latter uses the connector to interact with the REST API.
Next you can see different ways to interact with the library.
Interact with existing Project#
Gns3Connector and Project objects#
Here is an example of defining a connector object and a project that is already configured on a local GNS3 server:
>>> from gns3fy import Gns3Connector, Project
>>> from tabulate import tabulate

>>> server = Gns3Connector("http://localhost:3080")

# To show the available projects on the server
>>> print(
        tabulate(
            server.projects_summary(is_print=False),
            headers=["Project Name", "Project ID", "Total Nodes", "Total Links", "Status"],
        )
    )
"""
Project Name    Project ID                              Total Nodes    Total Links  Status
--------------  ------------------------------------  -------------  -------------  --------
test2           c9dc56bf-37b9-453b-8f95-2845ce8908e3             10              9  opened
API_TEST        4b21dfb3-675a-4efa-8613-2f7fb32e76fe              6              4  opened
mpls-bgpv2      f5de5917-0ac5-4850-82b1-1d7e3c777fa1             30             40  closed
"""

>>> lab = Project(name="API_TEST", connector=server)

# Retrieve its information and display
>>> lab.get()

>>> print(lab)
Project(project_id='4b21dfb3-675a-4efa-8613-2f7fb32e76fe', name='API_TEST', status='opened', ...)

# Access the project attributes
>>> print(f"Name: {lab.name} -- Status: {lab.status} -- Is auto_closed?: {lab.auto_close}")
"Name: API_TEST -- Status: closed -- Is auto_closed?: False"

# Open the project
>>> lab.open()
>>> lab.status
opened

# Verify the stats
>>> lab.stats
{'drawings': 0, 'links': 4, 'nodes': 6, 'snapshots': 0}

# List the names and status of all the nodes in the project
for node in lab.nodes:
    print(f"Node: {node.name} -- Node Type: {node.node_type} -- Status: {node.status}")
"""
Node: Ethernetswitch-1 -- Node Type: ethernet_switch -- Status: started
...
"""
As noted before you can also use the Gns3Connector as an interface object to the GNS3 server REST API.
>>> server.get_version()
{'local': False, 'version': '2.2.0b4'}

>>> server.get_templates()
[{'adapter_type': 'e1000',
  'adapters': 13,
  'bios_image': '',
  'boot_priority': 'c',
  'builtin': False,
  'category': 'router',
  'cdrom_image': '',
  'compute_id': 'local',
  ...
Node and Link objects#
You have access to the Node and Link objects as well, and this gives you the ability to start, stop, suspend the individual element in a GNS3 project.
...
>>> PROJECT_ID = "4b21dfb3-675a-4efa-8613-2f7fb32e76fe"
>>> alpine1 = Node(project_id=PROJECT_ID, name="alpine-1", connector=server)

>>> alpine1.get()
>>> print(alpine1)
Node(name='alpine-1', node_type='docker', node_directory= ...)

# And you can access the attributes the same way as the project
>>> print(f"Name: {alpine1.name} -- Status: {alpine1.status} -- Console: {alpine1.console}")
"Name: alpine-1 -- Status: started -- Console: 5005"

# Stop the node and start (you can just restart it as well)
>>> alpine1.stop()
>>> alpine1.status
stopped

>>> alpine1.start()
>>> alpine1.status
started

# You can also see the Link objects assigned to this node
>>> alpine1.links
[Link(link_id='4d9f1235-7fd1-466b-ad26-0b4b08beb778', link_type='ethernet', ...)]

# And in the same way you can interact with a Link object
>>> link1 = alpine1.links[0]
>>> print(f"Link Type: {link1.link_type} -- Capturing?: {link1.capturing} -- Endpoints: {link1.nodes}")
Link Type: ethernet -- Capturing?: False -- Endpoints: [{'adapter_number': 2, ...}]
Creating a new Project#
You can find here a couple of methods that are available on the interfaces provided by the library.
To navigate to some of them and see their value, lets create a simple lab on the server with 2 nodes connected betweem each other.
Project creation#
Lets start by creating a lab called test_lab
...
>>> lab = Project(name="test_lab", connector=server)

>>> lab.create()

>>> lab
Project(project_id='e83f1275-3a6f-48f7-88ee-36386ee27a55', name='test_lab', status='opened',...)
You can see you get the project_id. In GNS3 the project ID is key for all interactions under that project.
Note
For a complete list of the attibutes you can see the API Reference
Node creation#
Next, lets try and create a Ethernet switch node. For this we need to know the template and node type of it.
...
>>>  for template in server.get_templates():
...:     if "switch" in template["name"]:
...:         print(f"Template: {template['name']} -- ID: {template['template_id']}")
...:
"""
Template: Ethernet switch -- ID: 1966b864-93e7-32d5-965f-001384eec461
Template: Frame Relay switch -- ID: dd0f6f3a-ba58-3249-81cb-a1dd88407a47
Template: ATM switch -- ID: aaa764e2-b383-300f-8a0e-3493bbfdb7d2
"""

>>> server.get_template_by_name("Ethernet switch")
{'builtin': True,
 'category': 'switch',
 'console_type': 'none',
 'name': 'Ethernet switch',
 'symbol': ':/symbols/ethernet_switch.svg',
 'template_id': '1966b864-93e7-32d5-965f-001384eec461',
 'template_type': 'ethernet_switch'}
By knowing the template information of the device we can create the Node instace of it
...
>>> switch = Node(
...:    project_id=lab.project_id,
...:    connector=server,
...:    name="Ethernet-switch",
...:    template="Ethernet switch"
...:)

>>> switch.create()

>>> switch
Node(name='Ethernet-switch', project_id='6e75bca5-3fa0-4219-a7cf-f82c0540fb73', node_id='c3607609-49'...)
Note
For a complete list of the attibutes you can see the API Reference
Now lets add an docker Alpine host to the project (NOTE: The docker image and template needs to be already configured in GNS3)
...
>>> alpine = Node(
...:    project_id=lab.project_id,
...:    connector=server,
...:    name="alpine-host",
...:    template="alpine"
...:)

>>> alpine.create()

>>> alpine
Node(name='alpine-host', project_id='6e75bca5-3fa0-4219-a7cf-f82c0540fb73', node_id='8c11eb8b'...)

>>> alpine.properties
{'adapters': 2,
 'aux': 5026,
 'category': 'guest',
 'console_auto_start': False,
 'console_http_path': '/',
 'console_http_port': 80,
 'console_resolution': '1024x768',
 'console_type': 'telnet',
 'container_id': 'f26b6aee763a9399c93c86032b75717c57b260e5010e88c4d410ce13554771df',
 'custom_adapters': [],
 'environment': '',
 'extra_hosts': '',
 'extra_volumes': [],
 'image': 'alpine:latest',
 'start_command': '',
 'symbol': ':/symbols/affinity/circle/gray/docker.svg',
 'usage': ''}

>>> alpine.ports
[{'adapter_number': 0,
  'data_link_types': {'Ethernet': 'DLT_EN10MB'},
  'link_type': 'ethernet',
  'name': 'eth0',
  'port_number': 0,
  'short_name': 'eth0'},
 {'adapter_number': 1,
  'data_link_types': {'Ethernet': 'DLT_EN10MB'},
  'link_type': 'ethernet',
  'name': 'eth1',
  'port_number': 0,
  'short_name': 'eth1'}]
You can access all of the host attributes and see their specifications based on the template defined on the server.
To update the lab object with their latest nodes added
...
>>> lab.get()

# I have shorten the output shown
>>> lab.nodes
"""
[Node(name='Ethernet-switch', project_id='6e75bca5-3fa0-4219-a7cf-f82c0540fb73', node_id='c3607609...
Node(name='alpine-host1', project_id='6e75bca5-3fa0-4219-a7cf-f82c0540fb73', node_id='8c11eb8b...
]
"""
Link creation#
Next lets create a link between the switch and the alpine host.
Switch Etherner0 <--> Alpine Eth1
Note
For a complete list of the attibutes you can see the API Reference
This is one way to create a link (using the lab object), but you can also create it using a Link instance as well.
We need the link mapping to be set under the nodes attribute of the Link instance. For this we need:
node_idadapter_numberport_number
...
>>> switch.ports
[{'adapter_number': 0,
  'data_link_types': {'Ethernet': 'DLT_EN10MB'},
  'link_type': 'ethernet',
  'name': 'Ethernet0',
  'port_number': 0,
  'short_name': 'e0'},
 {'adapter_number': 0,
  'data_link_types': {'Ethernet': 'DLT_EN10MB'},
  'link_type': 'ethernet',
  'name': 'Ethernet1',
  'port_number': 1,
  'short_name': 'e1'},
  ...

>>> alpine.ports
[{'adapter_number': 0,
  'data_link_types': {'Ethernet': 'DLT_EN10MB'},
  'link_type': 'ethernet',
  'name': 'eth0',
  'port_number': 0,
  'short_name': 'eth0'},
 {'adapter_number': 1,
  'data_link_types': {'Ethernet': 'DLT_EN10MB'},
  'link_type': 'ethernet',
  'name': 'eth1',
  'port_number': 0,
  'short_name': 'eth1'}]
Gettings this information from both nodes we can create the Link.
...
>>> nodes = [
    dict(node_id=switch.node_id, adapter_number=0, port_number=1),
    dict(node_id=alpine.node_id, adapter_number=0, port_number=0)
]

>>> extra_link = Link(project_id=lab.project_id, connector=server, nodes=nodes)

>>> extra_link.create()

>>> extra_link
Link(link_id='edf38e1a-67e7-4060-8493-0e222ec22072', link_type='ethernet', project_id='6e75bca5'...)
You can get the latest link information on the project
...
>>> lab.get_links()

# You can see the 2 links created earlier
>>> lab.links
[Link(link_id='b0d0df11-8ed8-4d1d-98e4-3776c9b7bdce', link_type='ethernet'...
Link(link_id='=', link_type='ethernet'...]
You can see the final result if you open the lab on your GNS3 client:
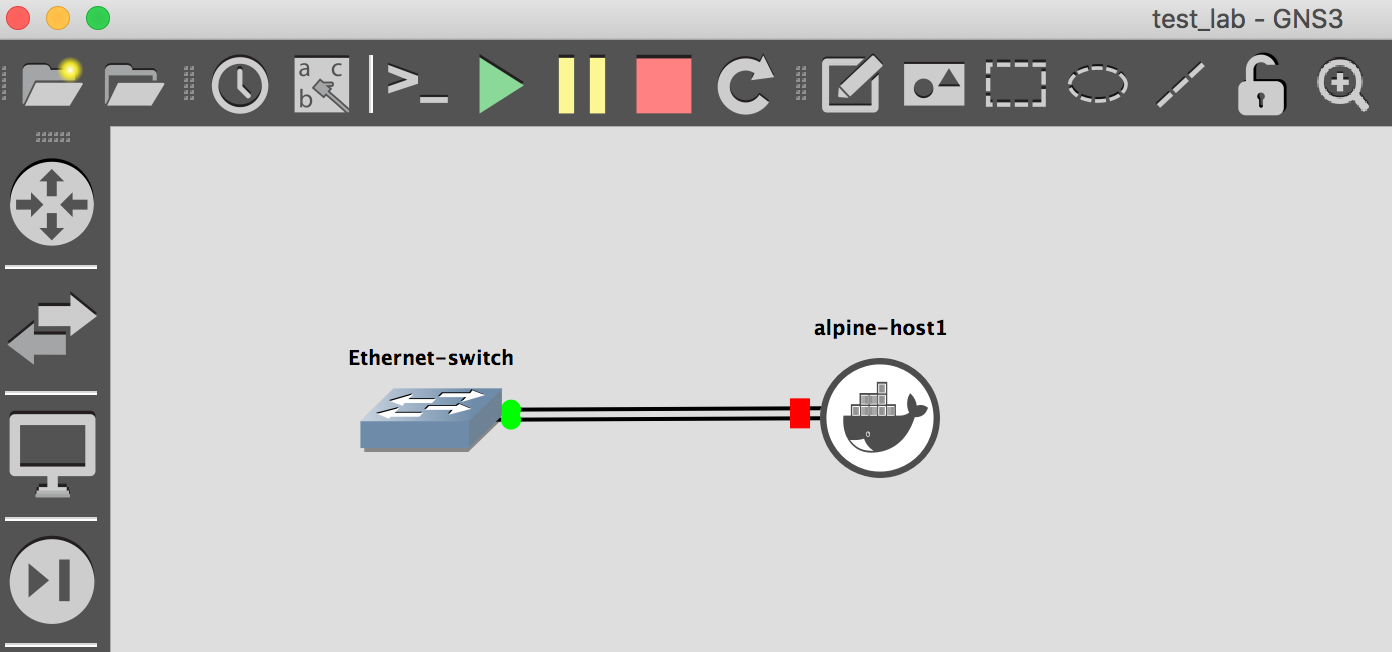
Note
The devices are all clustered together. This will be addressed in the future. For te moment you can re-arrange them the way you want
Examples#
Here are some examples of what you can do with the library
Manipulate a Node from a Project instance#
The Project object gives you all the nodes configured on it. This is typically saved under Project.nodes as a list of Node instances.
When collecting the information of a project on a given time, you also retrieve by default all of its nodes. Each of the nodes are assigned the Gns3Connector by default if you follow the procedure below.
...
>>> server = Gns3Connector(url="http://localhost:3080")]
>>> print(server)
'<gns3fy.gns3fy.Gns3Connector at 0x10d4c8e10>'
>>> lab = Project(name="lab", connector=server)

# Retrieve the lab information and print the amount of nodes configured
>>> lab.get()
>>> print(len(lab.nodes))
2

# Assign one of the nodes to a varaible and start manipulating it
>>> node_1 = lab.nodes[0]
>>> print(node_1.status)
'stopped'

>>> node_1.start()
>>> print(node_1.status)
'started'
>>> print(node_1.connector)
'<gns3fy.gns3fy.Gns3Connector at 0x10d4c8e10>'
node_1 has the same connector object as reference for interaction with the server.
The same can be done with a Link by interacting with the Project.links attribute.
Check existing templates and projects available#
The templates and projects configured on the GNS3 server can be viewed by using the templates_summary and projects_summary.
...
>>> from tabulate import tabulate
>>> templates_summary = server.templates_summary(is_print=False)
>>> print(
        tabulate(
            server.templates_summary(is_print=False),
            headers=[
                "Template Name",
                "Template ID",
                "Type",
                "Builtin",
                "Console",
                "Category",
            ],
        )
    )

"""
Template Name       Template ID                           Type                Builtin    Console    Category
------------------  ------------------------------------  ------------------  ---------  ---------  ----------
IOU-L3              8504c605-7914-4a8f-9cd4-a2638382db0e  iou                 False      telnet     router
IOU-L2              92cccfb2-6401-48f2-8964-3c75323be3cb  iou                 False      telnet     switch
vEOS                c6203d4b-d0ce-4951-bf18-c44369d46804  qemu                False      telnet     router
alpine              847e5333-6ac9-411f-a400-89838584371b  docker              False      telnet     guest
Cloud               39e257dc-8412-3174-b6b3-0ee3ed6a43e9  cloud               True       N/A        guest
NAT                 df8f4ea9-33b7-3e96-86a2-c39bc9bb649c  nat                 True       N/A        guest
VPCS                19021f99-e36f-394d-b4a1-8aaa902ab9cc  vpcs                True       N/A        guest
Ethernet switch     1966b864-93e7-32d5-965f-001384eec461  ethernet_switch     True       none       switch
Ethernet hub        b4503ea9-d6b6-3695-9fe4-1db3b39290b0  ethernet_hub        True       N/A        switch
Frame Relay switch  dd0f6f3a-ba58-3249-81cb-a1dd88407a47  frame_relay_switch  True       N/A        switch
ATM switch          aaa764e2-b383-300f-8a0e-3493bbfdb7d2  atm_switch          True       N/A        switch
"""

>>> projects_summary = server.projects_summary(is_print=False)
>>> print(
        tabulate(
            server.projects_summary(is_print=False),
            headers=[
                "Project Name",
                "Project ID",
                "Total Nodes",
                "Total Links",
                "Status",
            ],
        )
    )

"""
Project name    Project ID                              Total Nodes    Total Links  Status
--------------  ------------------------------------  -------------  -------------  --------
mgmt_network    c9dc56bf-37b9-453b-8f95-2845ce8908e3             10              9  opened
ospf_lab        4b21dfb3-675a-4efa-8613-2f7fb32e76fe              6              4  opened
[API] New test  f5de5917-0ac5-4850-82b1-1d7e3c777fa1              0              0  closed
test_ansible    5599f8f5-9074-4372-b20e-e96eb3bd27c6              4              4  opened
"""
Get Nodes and Links summary#
For a given project you can use nodes_summary and links_summary, that if used with a library like tabulate you can obtain the following:
...
>>> from tabulate import tabulate

>>> nodes_summary = lab.nodes_summary(is_print=False)

>>> print(
...     tabulate(nodes_summary, headers=["Node", "Status", "Console Port", "ID"])
... )
"""
Node              Status      Console Port  ID
----------------  --------  --------------  ------------------------------------
Ethernetswitch-1  started             5000  da28e1c0-9465-4f7c-b42c-49b2f4e1c64d
IOU1              started             5001  de23a89a-aa1f-446a-a950-31d4bf98653c
IOU2              started             5002  0d10d697-ef8d-40af-a4f3-fafe71f5458b
vEOS-4.21.5F-1    started             5003  8283b923-df0e-4bc1-8199-be6fea40f500
alpine-1          started             5005  ef503c45-e998-499d-88fc-2765614b313e
Cloud-1           started                   cde85a31-c97f-4551-9596-a3ed12c08498
"""
>>> links_summary = lab.links_summary(is_print=False)
>>> print(
...     tabulate(links_summary, headers=["Node A", "Port A", "Node B", "Port B"])
... )
"""
Node A          Port A       Node B            Port B
--------------  -----------  ----------------  -----------
IOU1            Ethernet1/0  IOU2              Ethernet1/0
vEOS-4.21.5F-1  Management1  Ethernetswitch-1  Ethernet0
vEOS-4.21.5F-1  Ethernet1    alpine-1          eth0
Cloud-1         eth1         Ethernetswitch-1  Ethernet7
"""
I have shown the projects_summary earlier, here is another one that is helpful
...
>>> print(
        tabulate(
            server.templates_summary(is_print=False),
            headers=[
                "Template Name",
                "Template ID",
                "Type",
                "Builtin",
                "Console",
                "Category",
            ],
        )
    )

"""
Template Name       Template ID                           Type                Builtin    Console    Category
------------------  ------------------------------------  ------------------  ---------  ---------  ----------
IOU-L3              8504c605-7914-4a8f-9cd4-a2638382db0e  iou                 False      telnet     router
IOU-L2              92cccfb2-6401-48f2-8964-3c75323be3cb  iou                 False      telnet     switch
vEOS                c6203d4b-d0ce-4951-bf18-c44369d46804  qemu                False      telnet     router
alpine              847e5333-6ac9-411f-a400-89838584371b  docker              False      telnet     guest
Cloud               39e257dc-8412-3174-b6b3-0ee3ed6a43e9  cloud               True       N/A        guest
NAT                 df8f4ea9-33b7-3e96-86a2-c39bc9bb649c  nat                 True       N/A        guest
VPCS                19021f99-e36f-394d-b4a1-8aaa902ab9cc  vpcs                True       N/A        guest
Ethernet switch     1966b864-93e7-32d5-965f-001384eec461  ethernet_switch     True       none       switch
Ethernet hub        b4503ea9-d6b6-3695-9fe4-1db3b39290b0  ethernet_hub        True       N/A        switch
Frame Relay switch  dd0f6f3a-ba58-3249-81cb-a1dd88407a47  frame_relay_switch  True       N/A        switch
ATM switch          aaa764e2-b383-300f-8a0e-3493bbfdb7d2  atm_switch          True       N/A        switch
"""
Migrate templates between GNS3 servers#
You may need to backup your current templates configuration of one server to another, or just want to standardize the templates used across your GNS3 server.
Here is a simple script that shows an example of how to achive it with Gns3Connector.
migrate_gns3_templates.py
from gns3fy import Gns3Connector

OLD_URL = "http://gns3server01:3080"
NEW_URL = "http://gns3server02:3080"

def main()
    # Define the server objects
    old_server = Gns3Connector(url=OLD_URL)
    new_server = Gns3Connector(url=NEW_URL)

    # Retrive their current templates
    old_server_templates = old_server.get_templates()
    new_server_templates = new_server.get_templates()

    # Now pass the templates
    for template in old_server_templates:
        # Bypass templates already configured on new server
        if any(template["name"] == x["name"] for x in new_server_templates):
            print(f"Template: {template['name']} already present. Skipping...")
            continue

        # Pass template
        new_server.create_template(**template)
        print(f"Template: {template['name']} passed!")

if __name__ == '__main__':
    main()
It can produce an output similar to this:
python migrate_gns3_templates.py
Template: vEOS-4.21.5F passed!
Template: Junos vMX passed!
Template: alpine passed!
Template: Cloud already present. Skipping...
Template: NAT already present. Skipping...
Template: VPCS already present. Skipping...
Template: Ethernet switch already present. Skipping...
Template: Ethernet hub already present. Skipping...
Template: Frame Relay switch already present. Skipping...
Template: ATM switch already present. Skipping...
Template: netautomator passed!
Template: Cisco IOSv 15.7(3)M3 passed!
Template: Cisco IOSvL2 15.2.1 passed!
Template: Cisco IOSvL2 15.2(20170321:233949) passed!
Template: Cisco IOS XRv 9000 6.5.1 passed!
Template: Cisco IOS XRv 6.1.3 passed!
Template: Cisco NX-OSv 7.3.0 passed!
Template: Cisco ASAv 9.9.2 passed!
Template: Cisco CSR1000v 16.9.4 passed!
Template: Cumulus VX 3.7.8 passed!
Template: Cisco NX-OSv 9000 7.0.3.I7.4 passed!
Template: Arista vEOS 4.21.5F passed!
Check server CPU and Memory usage#
You can use the get_compute method to retrieve information about the GNS3 server that is running the emulations.
Here is an example of getting the CPU and Memory average usage for a period of time and use that information to determine if a hungre service router can be turned on.
import time
from gns3fy import Gns3Connector, Project

server = Gns3Connector(url="http://gns3server")

lab = Project(name="test_lab", connector=server)

lab.get()

hungry_router = lab.get_node(name="hungry_router")

# Get the CPU and Memory usage and calculate its average
cpu_usage = []
memory_usage = []
for index in range(5):
    compute_attrs = server.get_compute(compute_id="local")
    cpu_usage.append(compute_attrs.get("cpu_usage_percent"))
    memory_usage.append(compute_attrs.get("memory_usage_percent"))
    time.sleep(1)

cpu_avg = round(sum(cpu_usage) / len(cpu_usage), 2)
mem_avg = round(sum(memory_usage) / len(memory_usage), 2)

# If CPU is less than 40% and Memory is less than 50% turnup the nodes
if cpu_avg <= 40.0 and mem_avg <= 50.0:
    hungry_router.start()
    print("All good! starting hungry router")
else:
    print(
        f"Hungry router does not have enough resources. CPU avg: {cpu_avg}%"
        f" Memory avg: {mem_avg}%"
    )
Create and list project snapshots#
There is an attribute called snapshots under the Project instance, which stores snapshots information about that project.
You can create, delete and also search for specific snapshots of a project. See the API reference
Here is a snippet that creates and shows information about the snapshots configured on a project.
from datetime import datetime
from gns3fy import Gns3Connector, Project

lab = Project(name="test3", connector=Gns3Connector(url="http://gns3server01:3080"))

lab.get()

# Create snapshot
lab.create_snapshot(name="snap3")

# Show configured snapshots
for snapshot in lab.snapshots:
    _time = datetime.utcfromtimestamp(snapshot['created_at']).strftime('%Y-%m-%d %H:%M:%S')
    print(f"Snapshot: {snapshot['name']}, created at: {_time}")
It prints something similar to this:
Created snapshot: snap3

Snapshot: snap1, created at: 2019-09-28 20:59:50
Snapshot: snap2, created at: 2019-09-28 20:59:54
Snapshot: snap3, created at: 2019-09-29 08:44:28